Getting started with Spring Boot using H2 Db
Retrieve the information from H2 database via Rest Endpoints


What is Spring Boot?
Spring Boot is an open-source java-based framework used to create backend web applications.
What you will learn from this blog?
Developing a spring boot application
Creating rest endpoint
Connecting to the h2 database
Developing Spring Boot Application
To start with, we will be using spring initializr to create the spring boot application.
Invoke https://start.spring.io/ via browser and you will see the below screen.
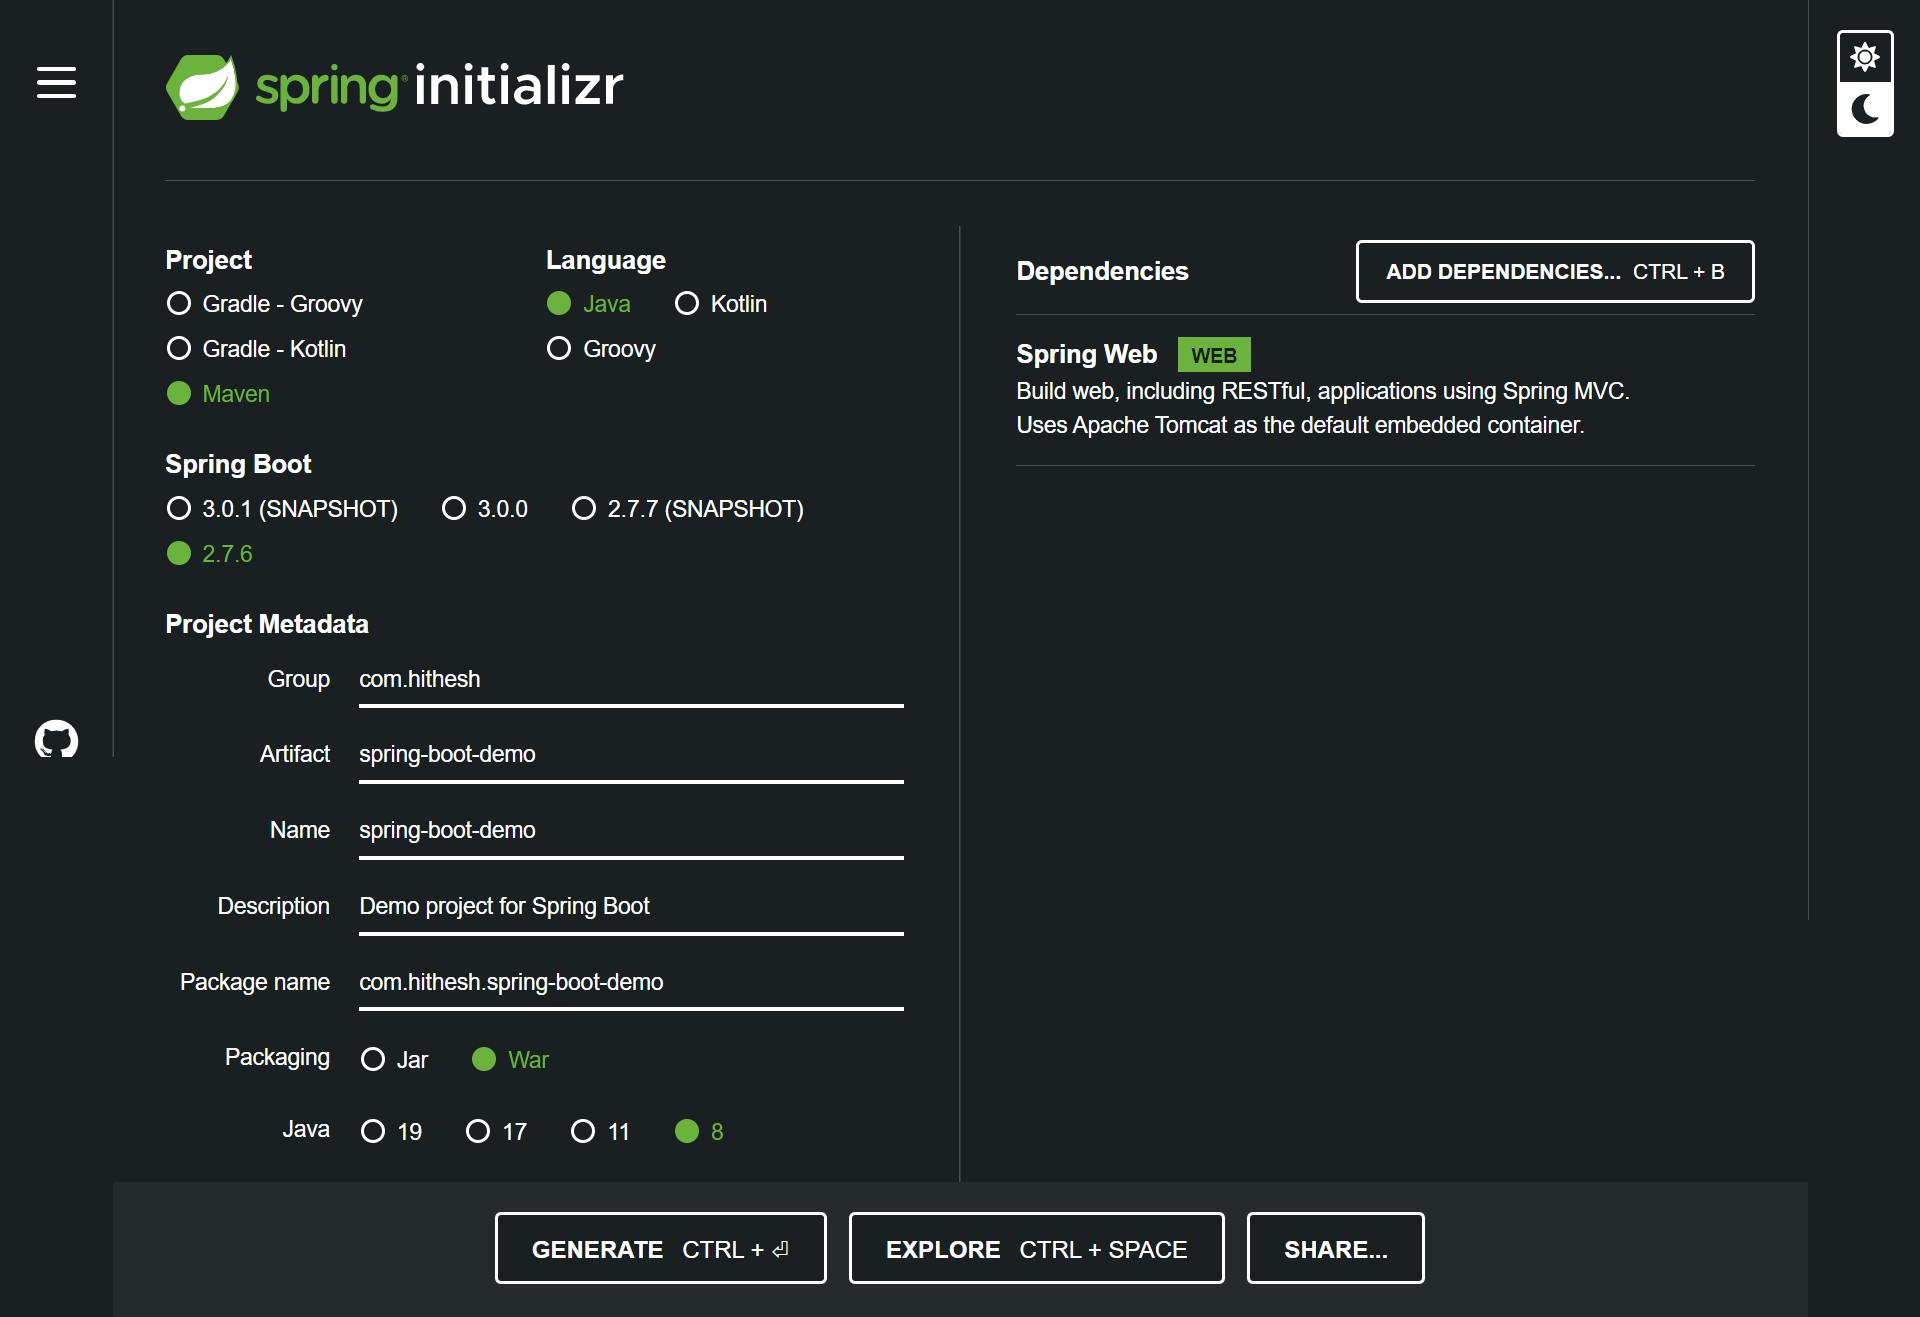
select the required language, build tool (maven in our case) and then add the artifact and project name.
Add the Spring web dependency from the dependencies tab.
Generate the project as a Zip file and add it to the IDE. (IntelliJ/Eclipse)
Build the project(mvn clean install) and start the application using the play button in the IDE.

Since Spring Boot provides the inbuilt tomcat via spring-boot-starter-tomcat dependency, We can start the application and hit http://localhost:8080/
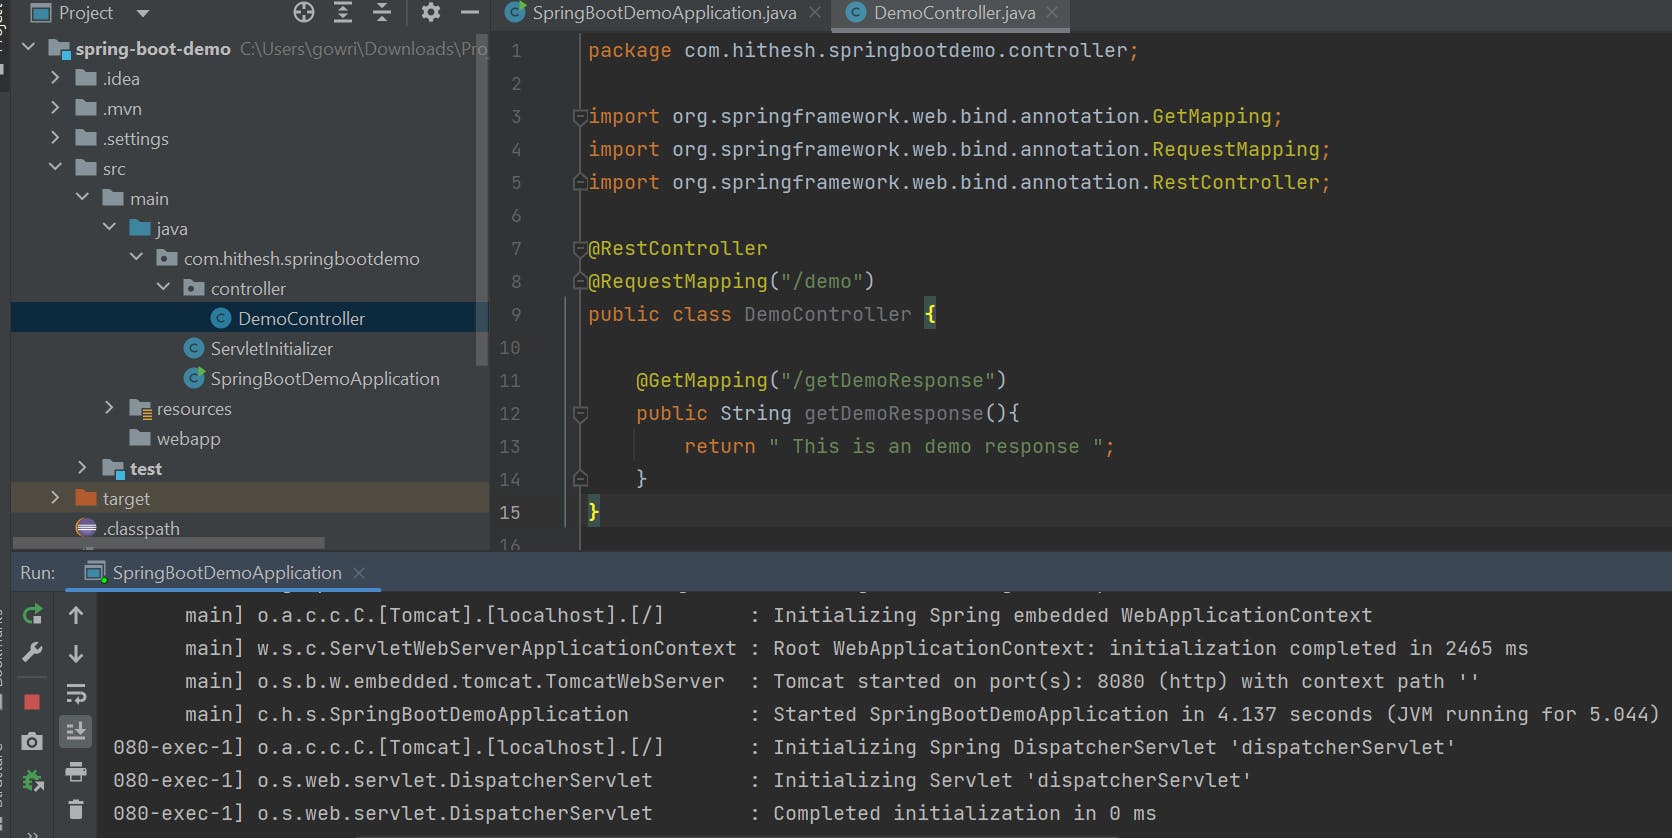
Creating Rest Endpoint
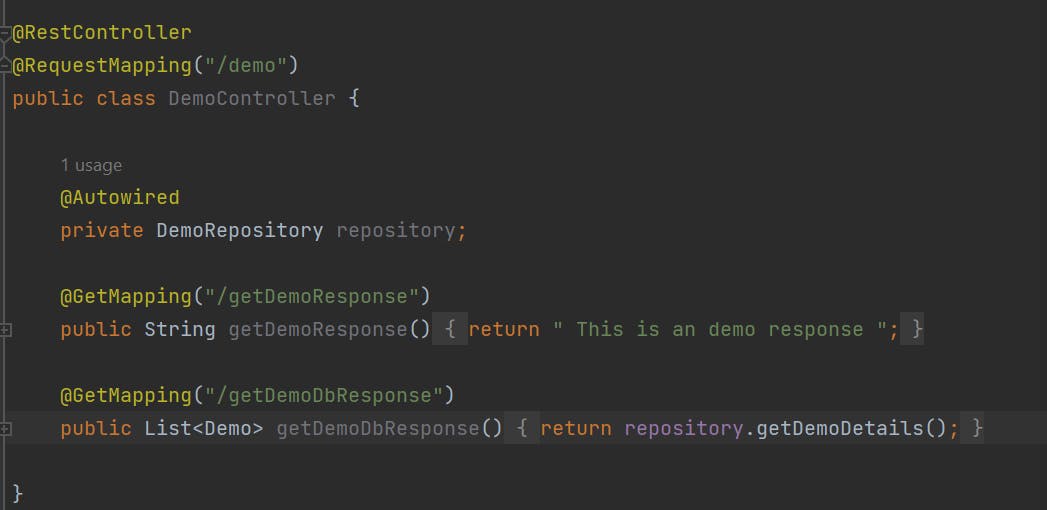
Create a controller package and create a class(DemoController) within it.
Annotate the class with @RestController and @RequestMapping with the path.
Since we are creating a sample Rest endpoint, create a demo method and annotate it with @Getmapping and provide the path.
start the application and invoke the endpoint as per the path provided.
hit the URL http://localhost:8080/demo/getDemoResponse and observe the response in the browser/postman as shown below
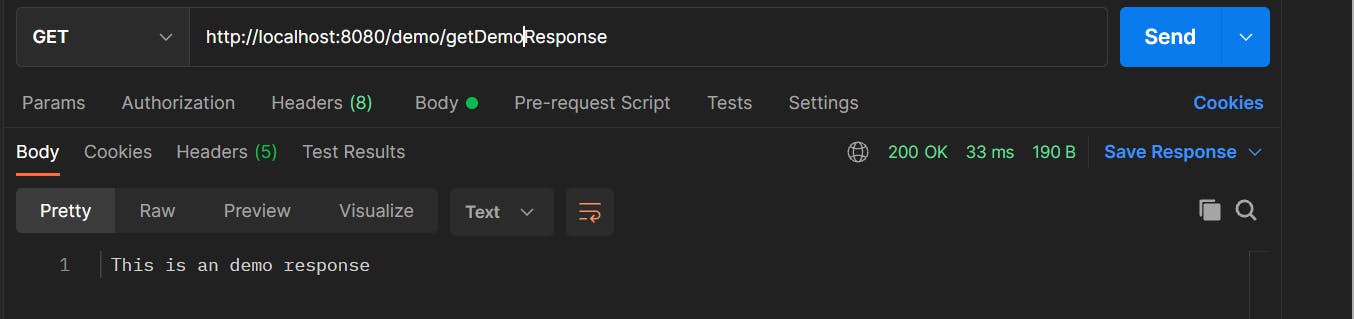
We have successfully created a Rest endpoint that provides a static response.
Connecting to H2 Database
H2 is an in memory-database which gets started at runtime and destroyed when the application is shut down. H2 is used only in the development and testing phases. It is not suitable for production development.
Add the h2 and spring-boot-starter-jdbc dependency to the pom.xml file
<dependency>
    <groupId>com.h2database</groupId>
    <artifactId>h2</artifactId>
    <scope>runtime</scope>
</dependency>
<dependency>
    <groupId>org.springframework.boot</groupId>
    <artifactId>spring-boot-starter-jdbc</artifactId>
</dependency>
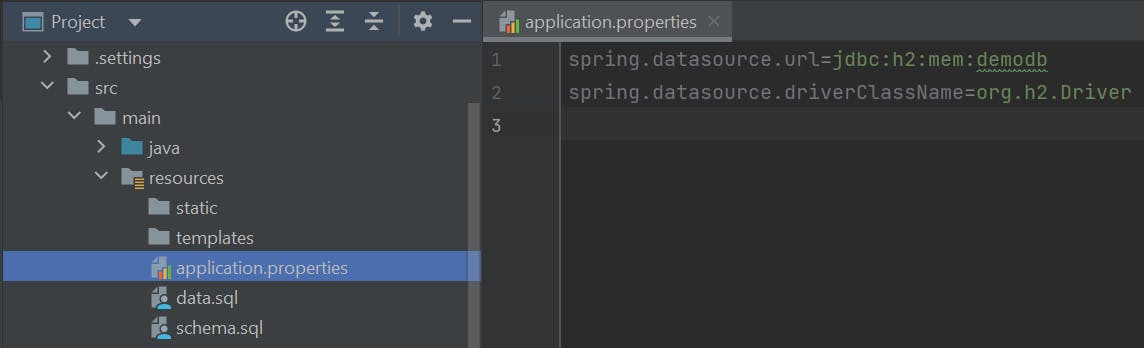
provide the database driver details in the application.properties file as shown below
create the data.sql and schema.sql files. Enter the script to create the table and insert the data.
-- Data in schema.sql
create table demo
(
   id integer not null,
   name varchar(255) not null,
   role varchar(255) not null,
   primary key(id)
);

-- Data in data.sql
insert into demo values(101,'Hithesh', 'Developer');
insert into demo values(102,'Kunal', 'DevRel Manager');
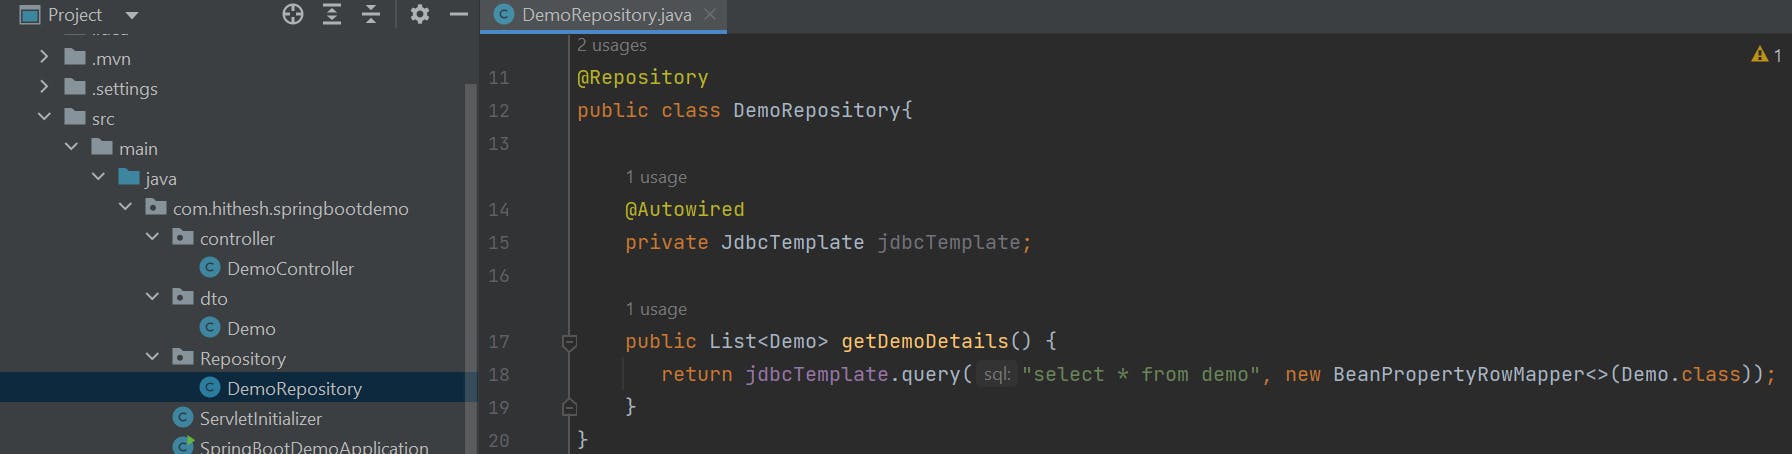
Create a Repository class and annotate with @Repository and Autowire the JDBCTemplate as shown below.
Modify the controller class by autowiring with Repository and providing a new method to display the records present in the database.
We have completed building the logic and enabled the new endpoint to retrieve the data from the database.
Now, start the application and hit the URL http://localhost:8080/demo/getDemoDbResponse
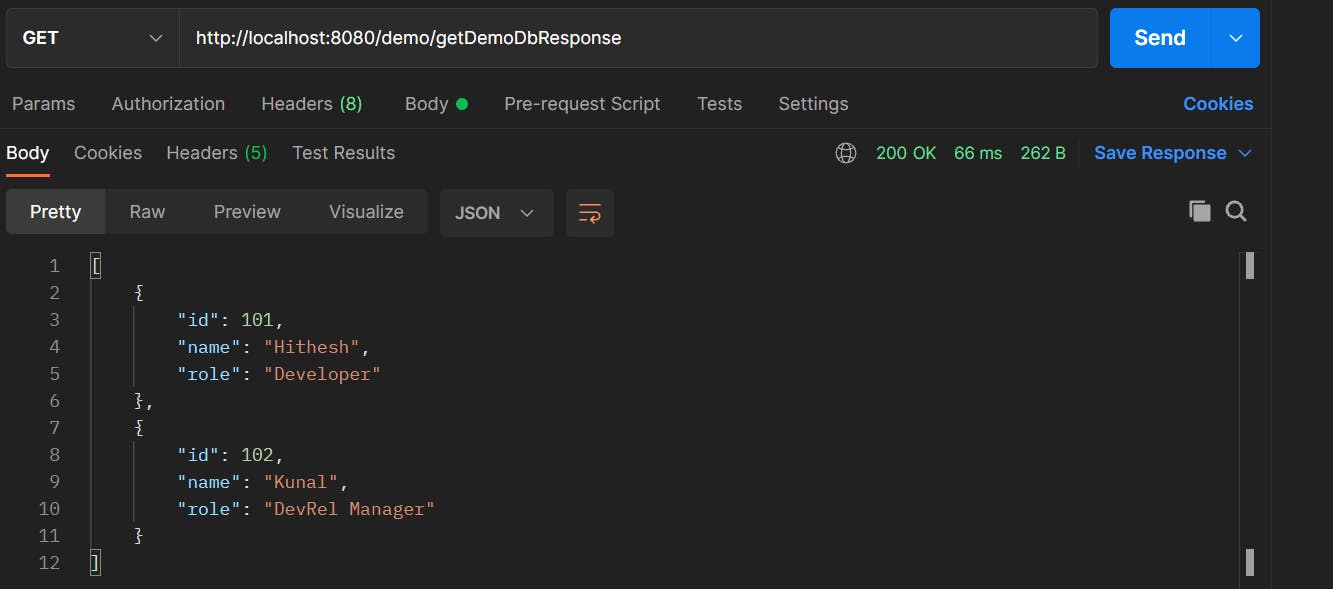
YAY!!.. Finally, we have developed a Spring boot application which retrieves the data stored in the database via Rest Apis.
The source code is available on GitHub mentioned below
You can follow me on Twitter and Linkedin. Happy Learning .. 😊👍